
Creating a Viber Campaign
Add a sender ID to send Viber via the Yespo system. You can do this in one of the following ways:
- via message editor,
- via account settings,
- via sending a request to the sales department info@yespo.io
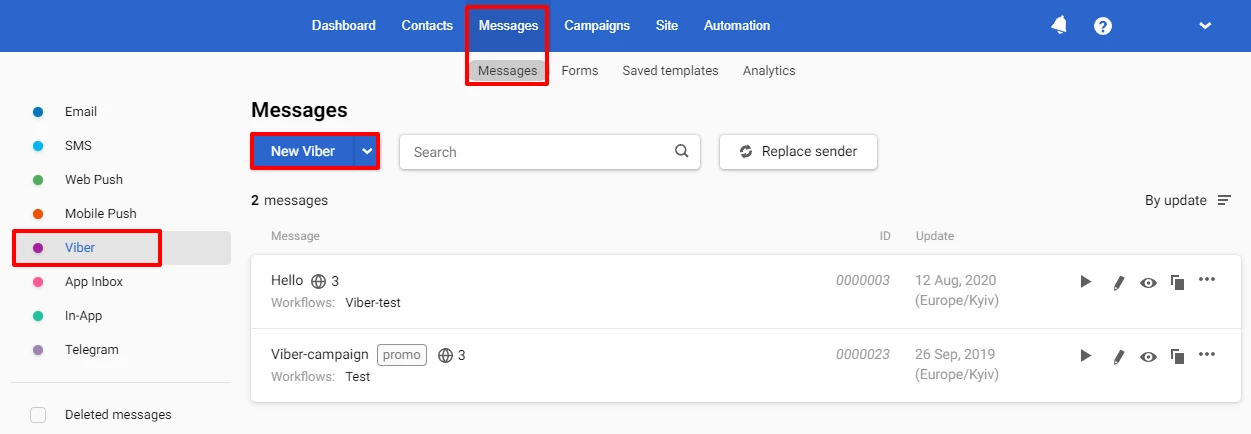
Creating New Viber Message
Go to Messages → Messages → Viber. Click the New Viber button.
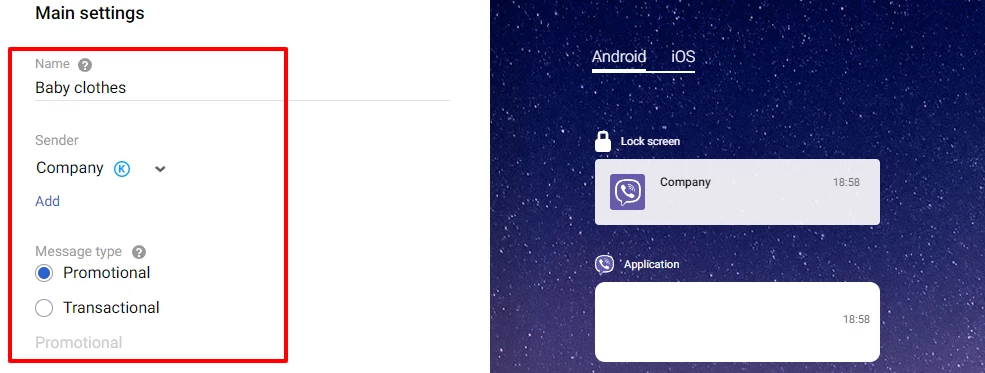
Main settings
Fill in the following fields:
- Name. The system name that the recipient will not see.
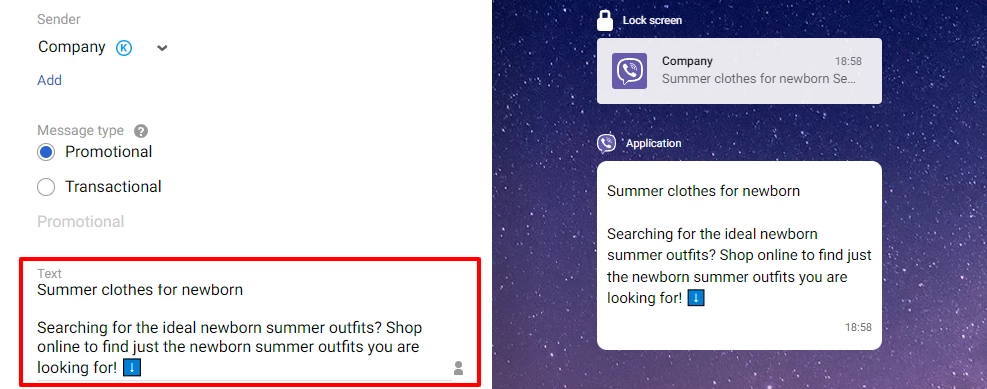
- Sender. Sender ID that was added to the system. Users will see it as the sender of the message.
- Message type. You can use a few types for different purposes:
- Transactional message — contains only text.
- Promotional message — can contain text, an image, and a button. Providers charge higher prices for promotional messages than for transactional messages.
Important
Before sending, Viber should approve the transactional message template. Messages with unapproved text will not be delivered.
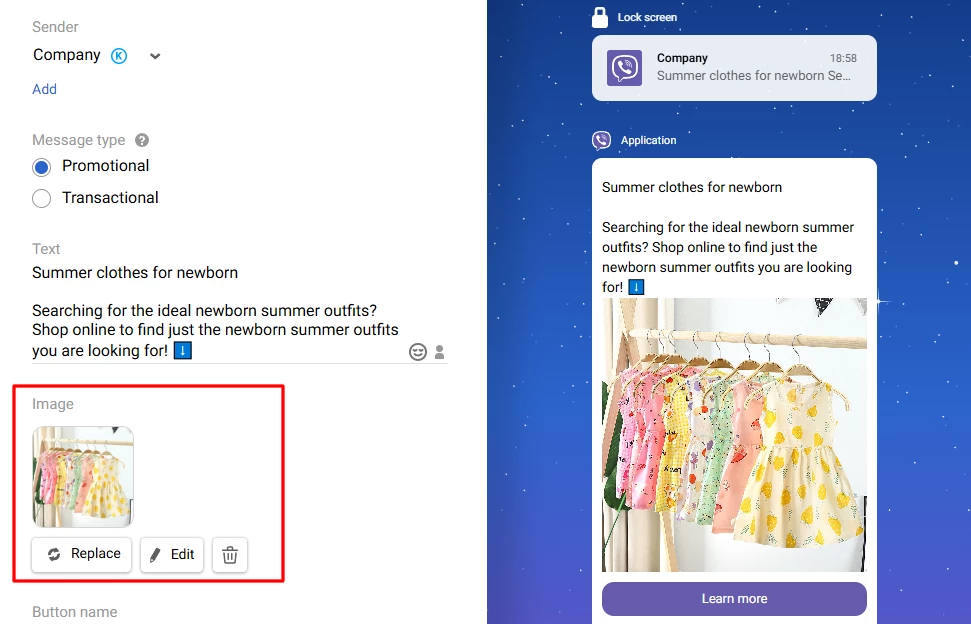
- Text. The main content of the message.
It can include:
- Up to 1,000 symbols;
- Emoji and special characters;
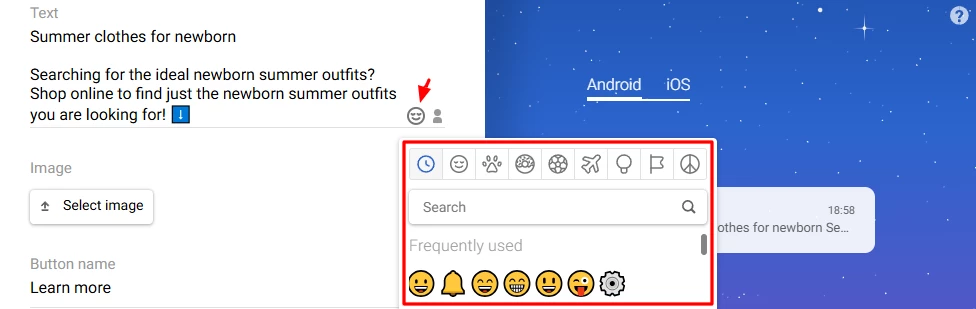
- Clickable links;
- Clickable phone number.
Note
Tracking is fixed only for clickable
http://andhttps://links.
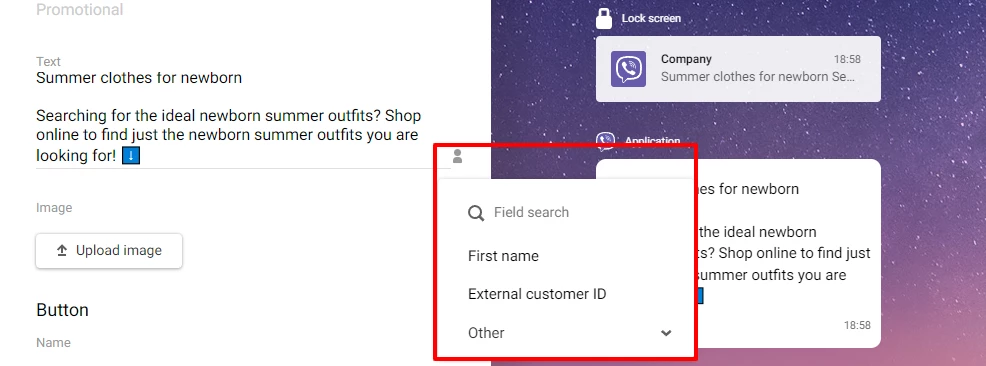
- Personalization. Use the dynamic variables to add a name, city, bonuses or any personal data available in the user profile. Click on the Personalization icon in the Text field to select data.
- Image. Upload JPEG or PNG file up to 2 MB. It is better to use square images (1:1 aspect ratio). When zooming, the image will be fully displayed on any device. You can also use a variable or a link to the image. Use only the
httpsprotocol for direct references in expressions.
Note
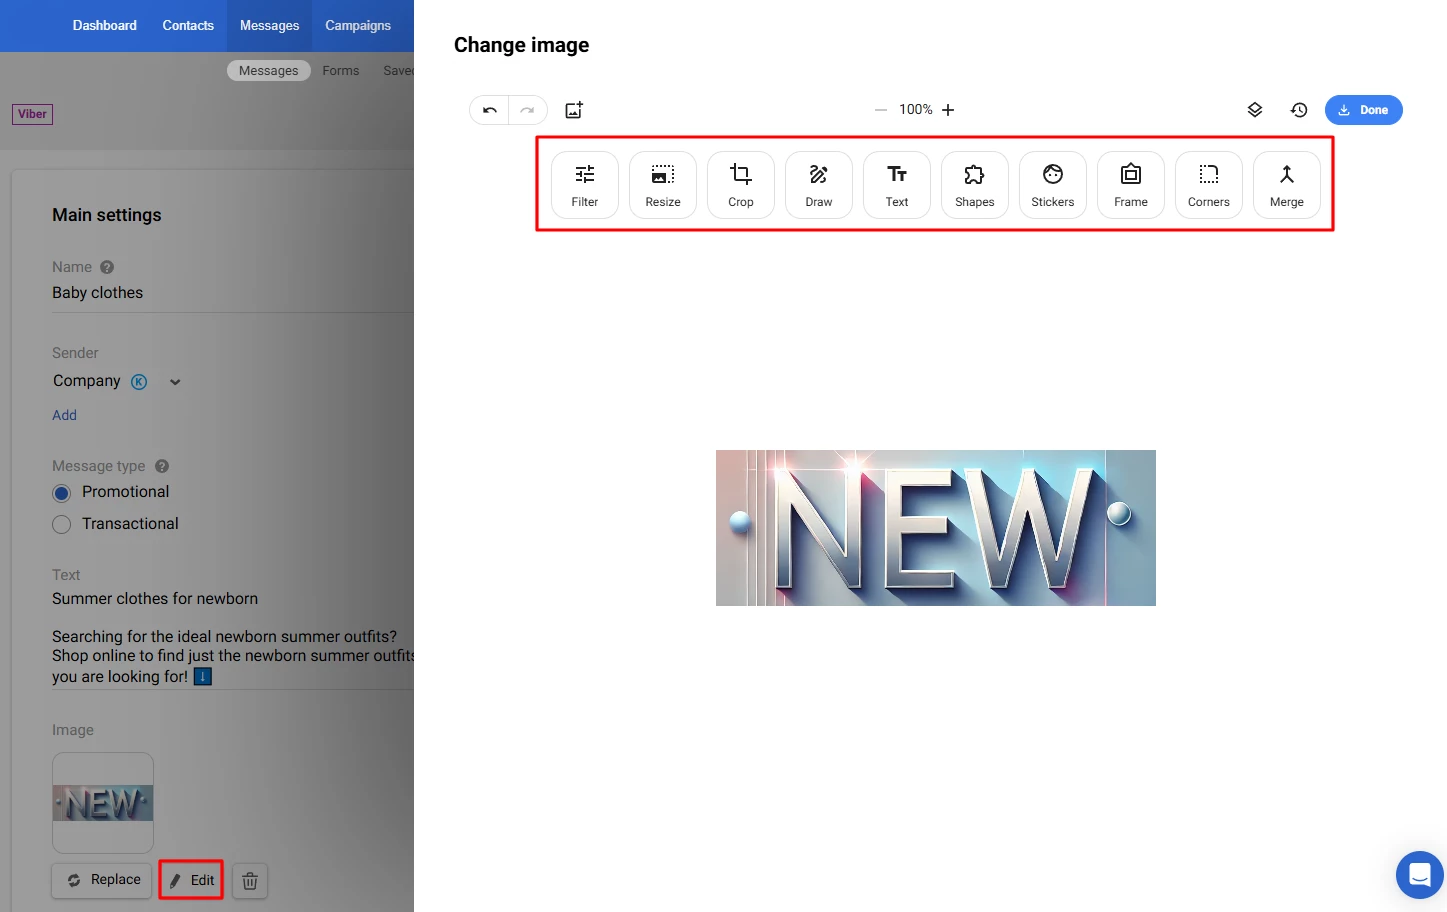
You can edit the image directly in the editor when uploading (if it does not meet the requirements) or after uploading (the Edit button). After editing, the image is saved in PNG format.
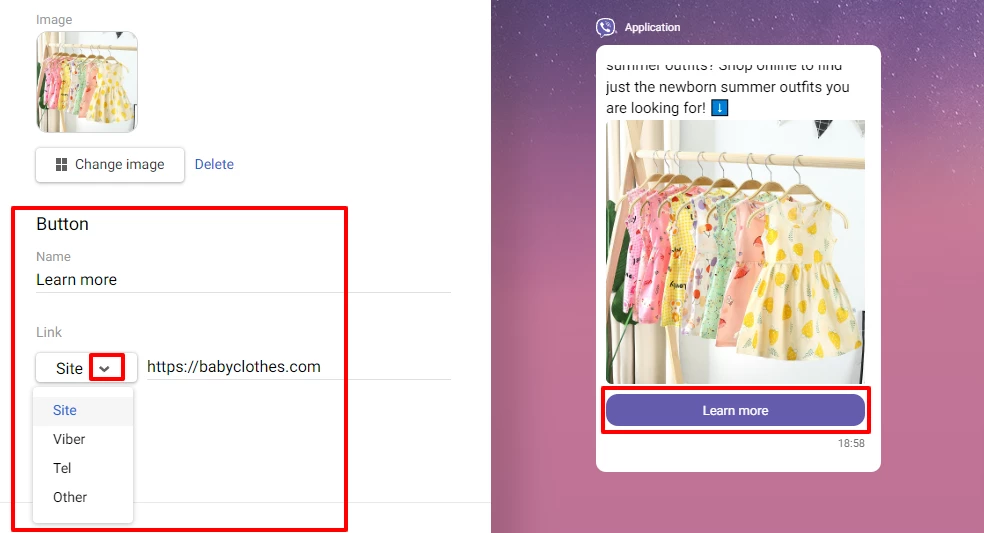
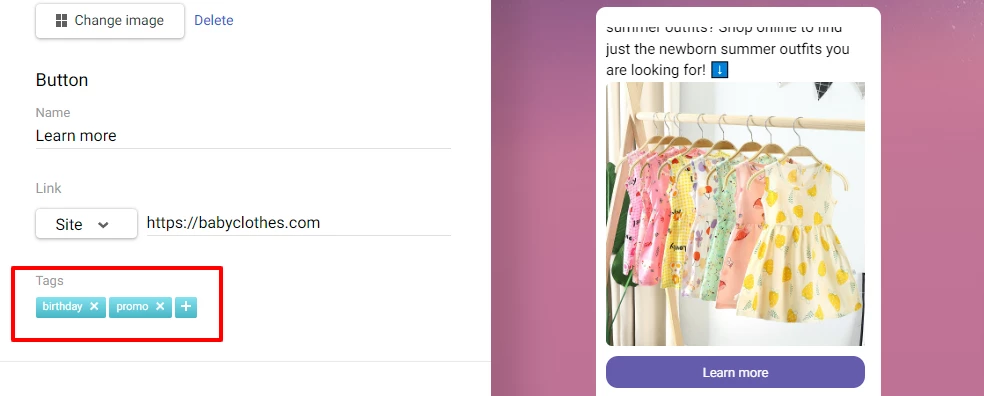
- Button. You can add one button with the following parameters:
- Name — display text on a button.
- Link — a website link, phone number, Viber, and other.
Note
Tracking is fixed only for
http://andhttps://links of the Site parameter. For Viber, Tel and Other parameters tracking is not fixed.
- Tags. Select tags from the list or enter a new one and click Enter. Use tags to filter search results and set campaign frequency strategy.
Additional settings
Fill in the following fields:
- Subscription categories. Manage subscription categories to send messages to your contacts based on their preferences.
- Time to Live (TTL). TTL — the period after which the message will not be displayed if it has not been delivered by this time. By default, it’s 1 day, but you can select other options.
- UTM tags. UTM tags are enabled by default. The switch activates the setting for all language versions when sending multilingual messages. You can manually add custom UTM tags to the message URL.
- Send SMS if Viber is not delivered. If you use the services of a Viber provider (except Kyivstar), you can automatically send SMS to contacts who do not have a Viber account. To do this, activate the appropriate option and enter the text of the SMS message. The sender of such SMS can only be the same as for Viber campaign.

Note
If your account does not have the Send SMS if Viber is not delivered option, please send a request for activation to support@yespo.io.
Multilingual version (optional)
In our platform, you can create a multilingual version of any message. Click the Globe icon in the top panel, specify the default language, and add language versions. Fill each version with the content in the corresponding language. You can switch between versions within one template in one click.

Learn more about multilanguage >
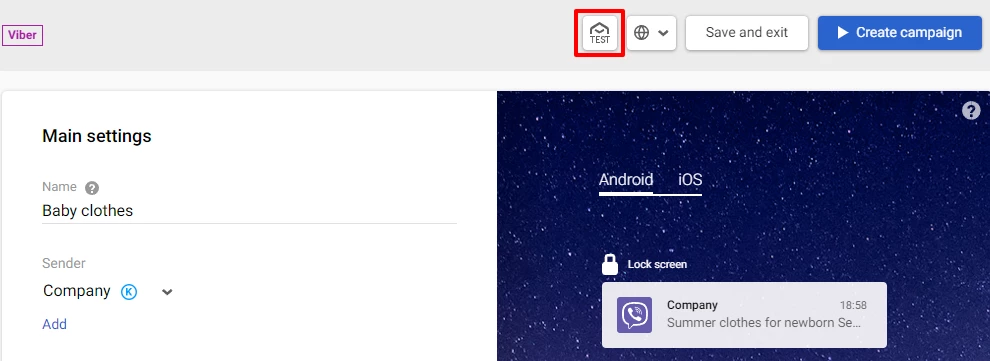
Testing Message
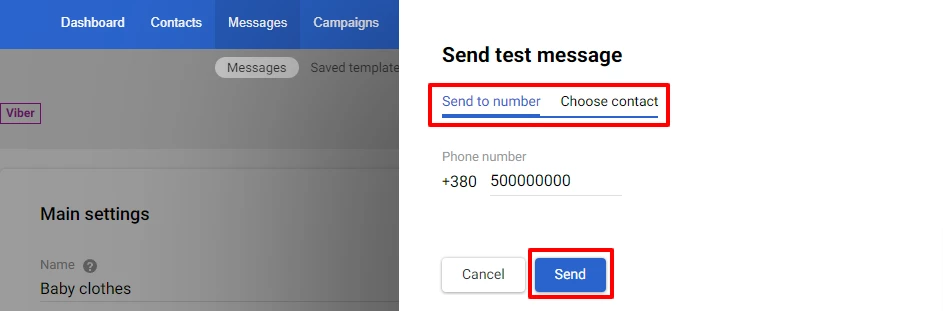
- Test the messages by clicking the Test button on the top panel.
- In a popup window, enter a phone number or select it from the Choose contact tab and click Send.
Creating Campaign
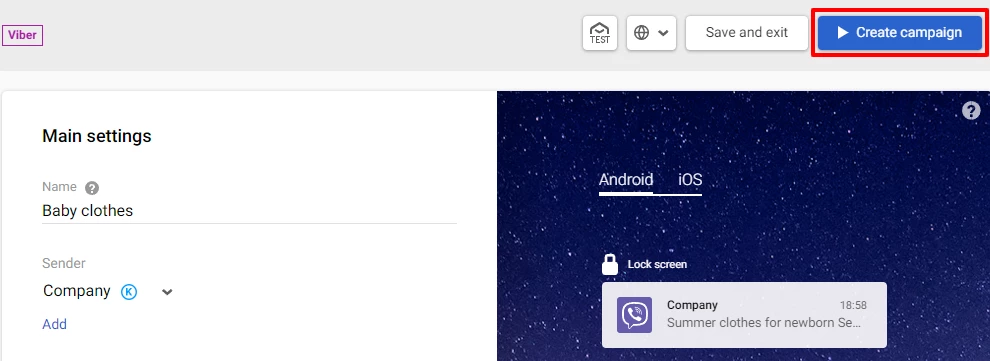
- Click on the Create campaign button.
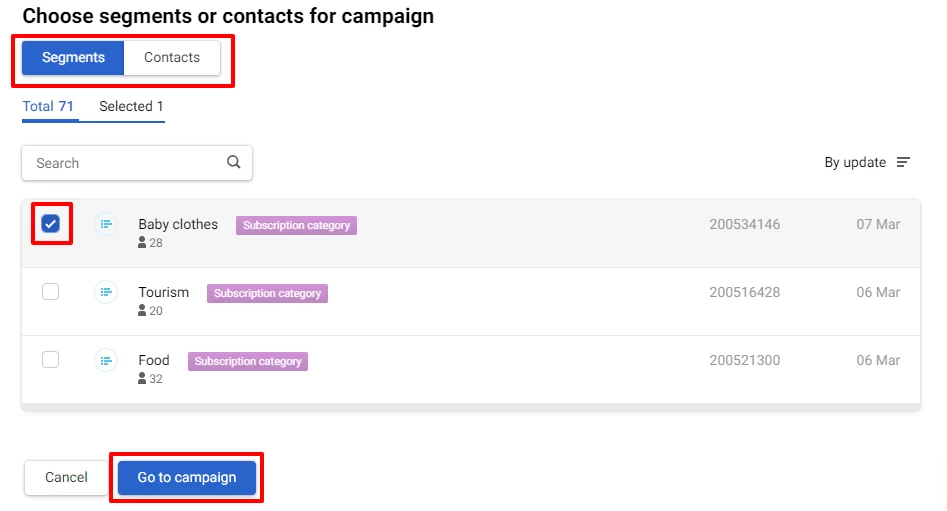
- In a popup window, choose segments or contacts for the campaign. Click Go to campaign.
- On the general checkout page:
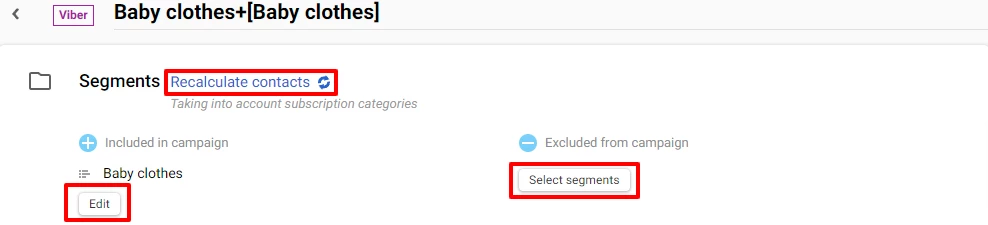
- In the Segments section, click Recalculate contacts to see the total number of contacts that will receive the notification. You can also edit segments or select new ones.
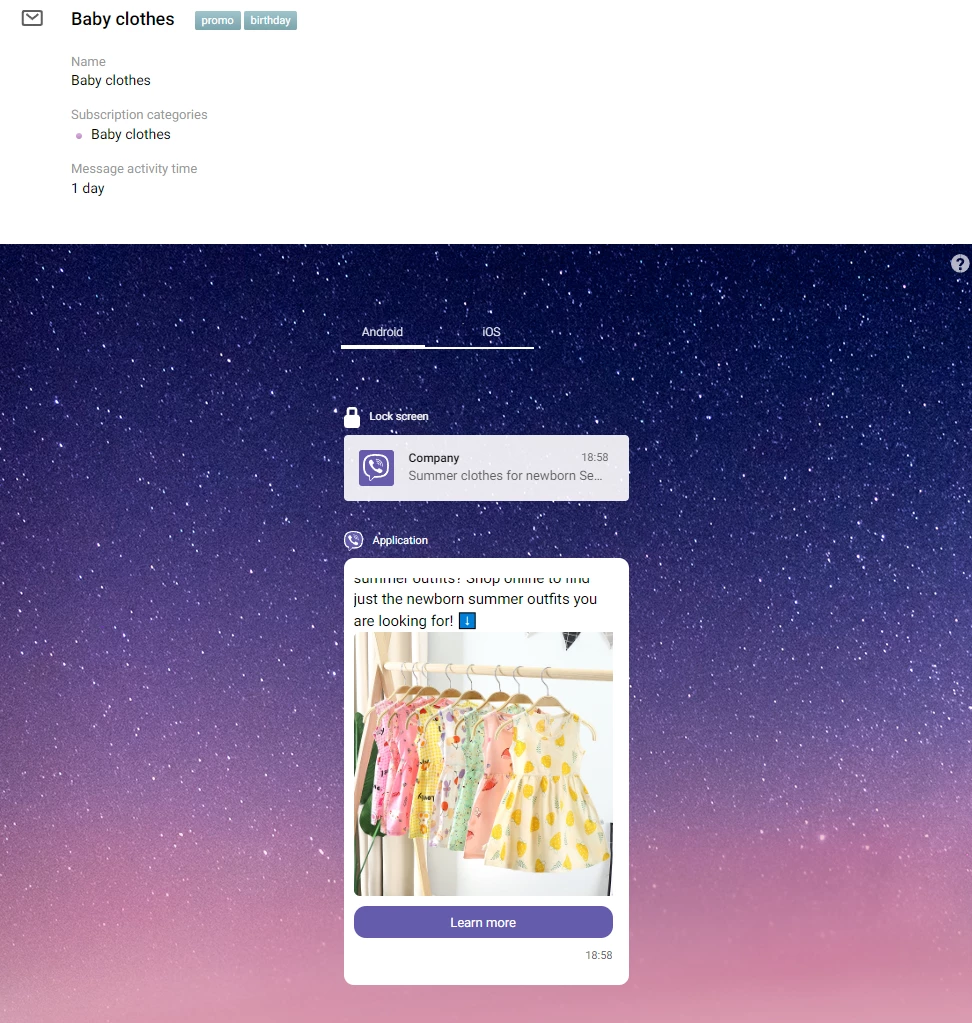
- See all the necessary information for verification: Name, Subscription categories, Message activity time. You can see how the message will look on different platforms (Android, iOS).
- In the Send options, you can set the batching. Click the Start immediately button to launch the campaign. For a delayed start, select the Schedule button and set the date and time of sending.

Updated 3 months ago