
Creating Recommendation Block
This guide describes creating a recommendation block in the Yespo account — a customization option for sites based on templating engines and projects without resources for designing on their own.
To create a block, go to Site → Recommendations and click New recommendation.

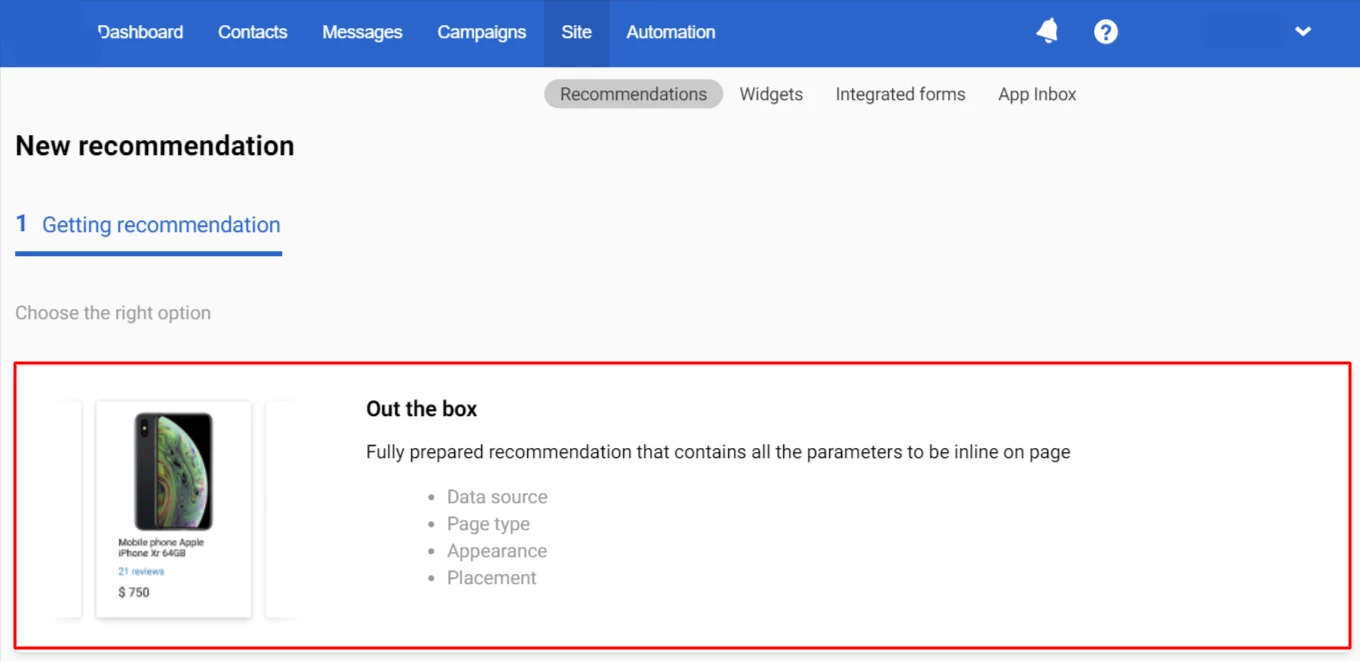
1. Getting Recommendation
Select the Out the box option.
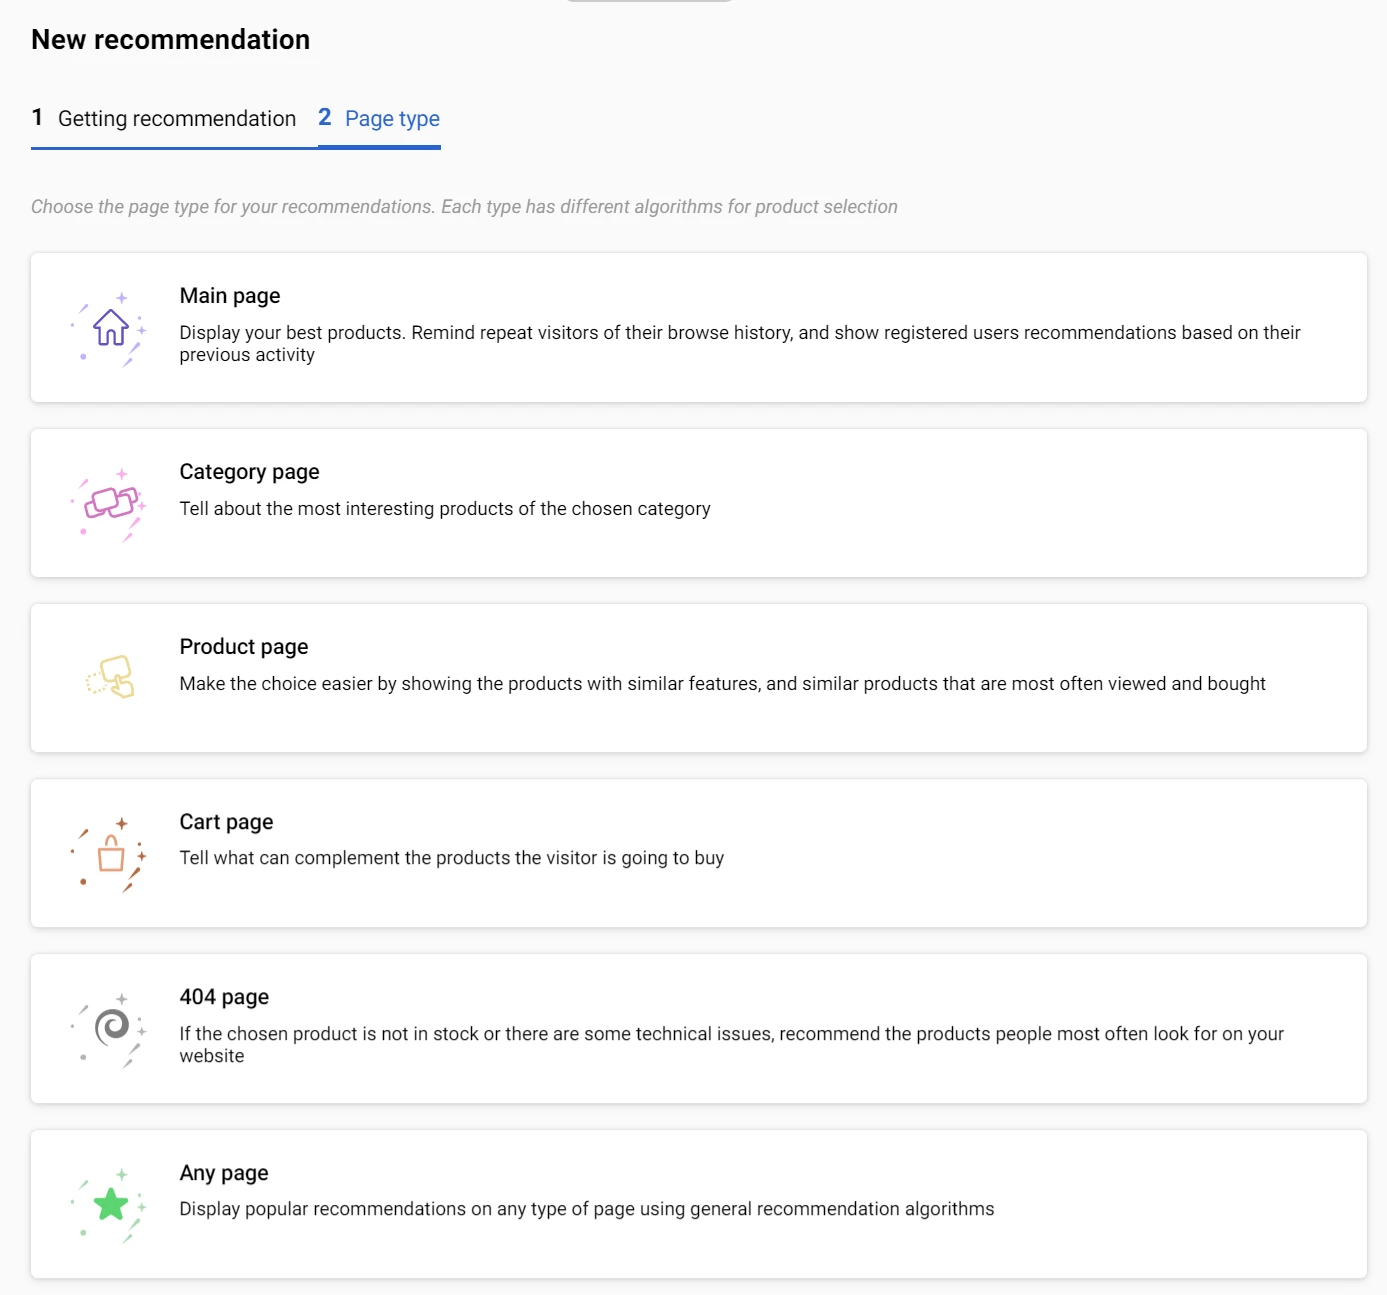
2. Page Type
Choose the page type for recommendation placement:
- Main page;
- Category page;
- Product page;
- Cart page;
- 404 page;
- Any page.
Each type has specific algorithms for product selections, for example, best-selling products for the main page or personalized recommendations for the category page, etc.
If you choose no type and click Next, you’ll be directed to the main page settings by default.
3. Data Source
Data sources contain the algorithms for products that will be shown in the recommendations. Select a data source from the list. You can also add custom filter rules for the block.
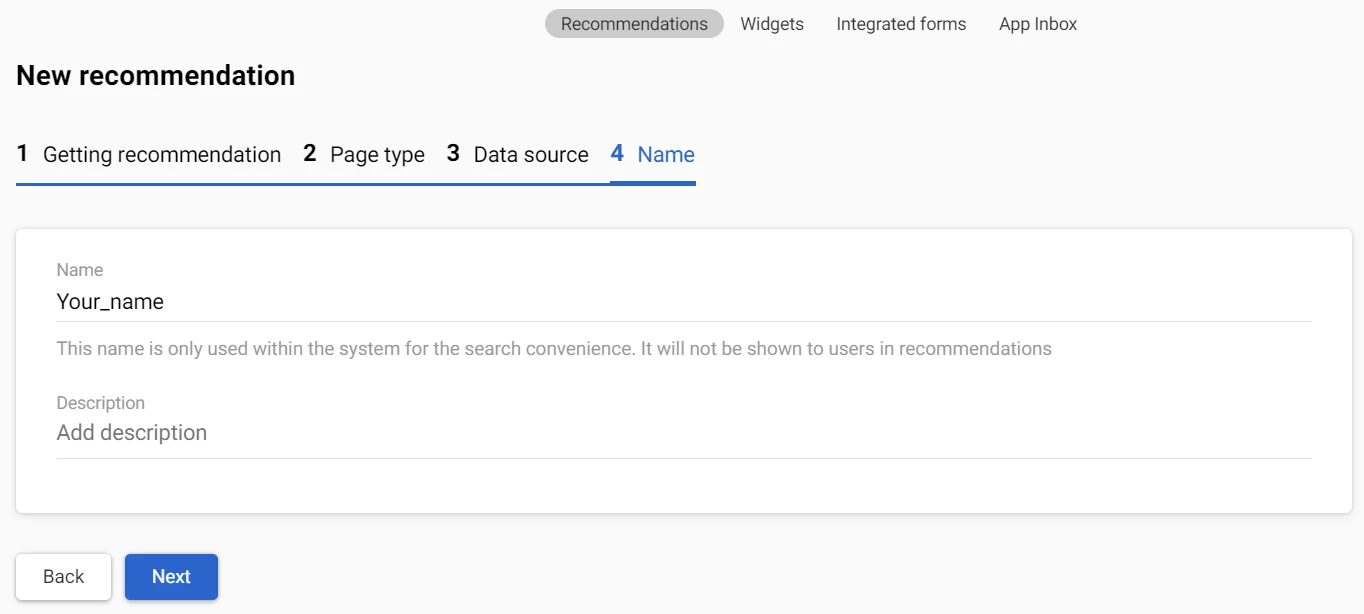
4. Recommendation Block Name
Enter the recommendation name and description. The name is used within the system to find the recommendation. Website visitors will not see it.
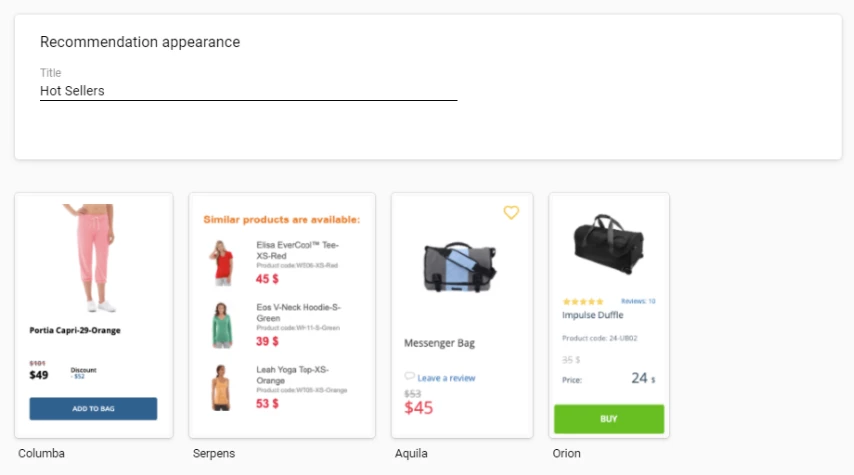
5. Appearance
Set up the block appearance, which consists of the following:
- the title that will be displayed on your site;
- selections of recommendations that look like product cards.
The title is displayed above the block. Its task is to attract users' attention and tell what products are presented. Write it in the appropriate field.
The next step is to choose the block’s design. You can choose one of the ready-made templates or upload your HTML code with CSS styles and JS settings.
Creating a block in your website style
So that you have a block in your website style in the available appearances, download its code in the Site → Recommendations → Appearance section.
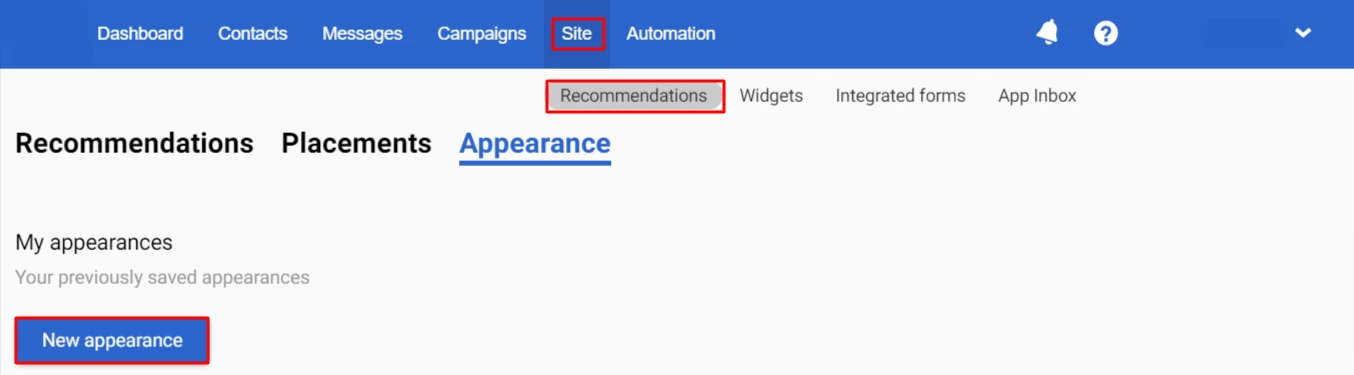
Click the New appearance button to open the code editor and customize the recommendation block. Settings are made in the HTML, CSS, and JS tabs.

HTML
We recommend adding only the content of the body tag to the HTML tab.
If using a limited-width template, ensure your site has enough space.
Data is rendered using Velocity dynamic content.
To display the header, add a class with reference to $!recom.header, for example:
$!recom.header
All recommendation containers must be nested inside a loop, for example:
#foreach( $!product in $!products )


//recommendation container


#end
Source variables like name must be accessed via the $!product.name structure. The list of standard variables is displayed in the prompt if you start entering $!pr; all other (custom) feed fields are accessed via tags_, for example:
$!product.tags_oldprice
Using Velocity, you can specify a condition for displaying a value, for example, display an element only if the field's value is equal to or not equal to the specified value. For example, if the Description field from the feed is not empty, to display the Description button, place its structure in the construction:
#if ($!product.descr != '')
$!product.get('descr')


#end
An example of recalculating the value of the product taking into account the old and new price:
#set($saleDiff = $product.tags_oldprice – $product.price)


#if($saleDiff > 0)


– $saleDiff грн.


#end
An example of a product rating display – 1-5 stars (must be supported in CSS):
#set($filled = '') #set($notFilled = '') #set($start = 1) #set($end = 5) #set($range = [$start..$end]) #foreach($i in $range) #if ($i <= $product.tags_rating) $filled #end #if ($i > $product.tags_rating) $notFilled #end #end
CSS
Since the recommendations will be embedded in the site, the site's styles may affect the styles of the recommendations. To avoid this, use unique classes (for example, a specific class prefix that is not used elsewhere on your site):
.es-productsContainer--link
If this is not enough, you need to strengthen the weight of the selector with an intermediate class, for example:
.es-productsContainer.es-productsContainer--link
Use some content when creating a new style sheet. This will help you quickly find the pieces of code you need when there is a lot of code. Example:
/* Container styles start */
To create the same CSS rule for multiple elements, put it in a separate class.
JS
Use JS code to customize the recommendation block's advanced features, such as animations, sliders, etc.
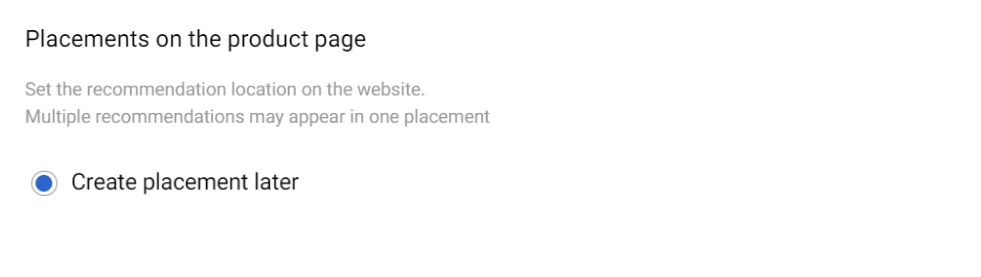
6. Placement of the Block
By default, there are no ready places to place recommendations. First, create placements, then return to their selection (instructions for creating placement).
Therefore, select the Create placement later option and click the Done button.
7. Testing and Publication of the Block
Select the created recommendation. At this stage, it is visible only to you.
To publish or view the created block on the page, specify its placement in the Placement field.
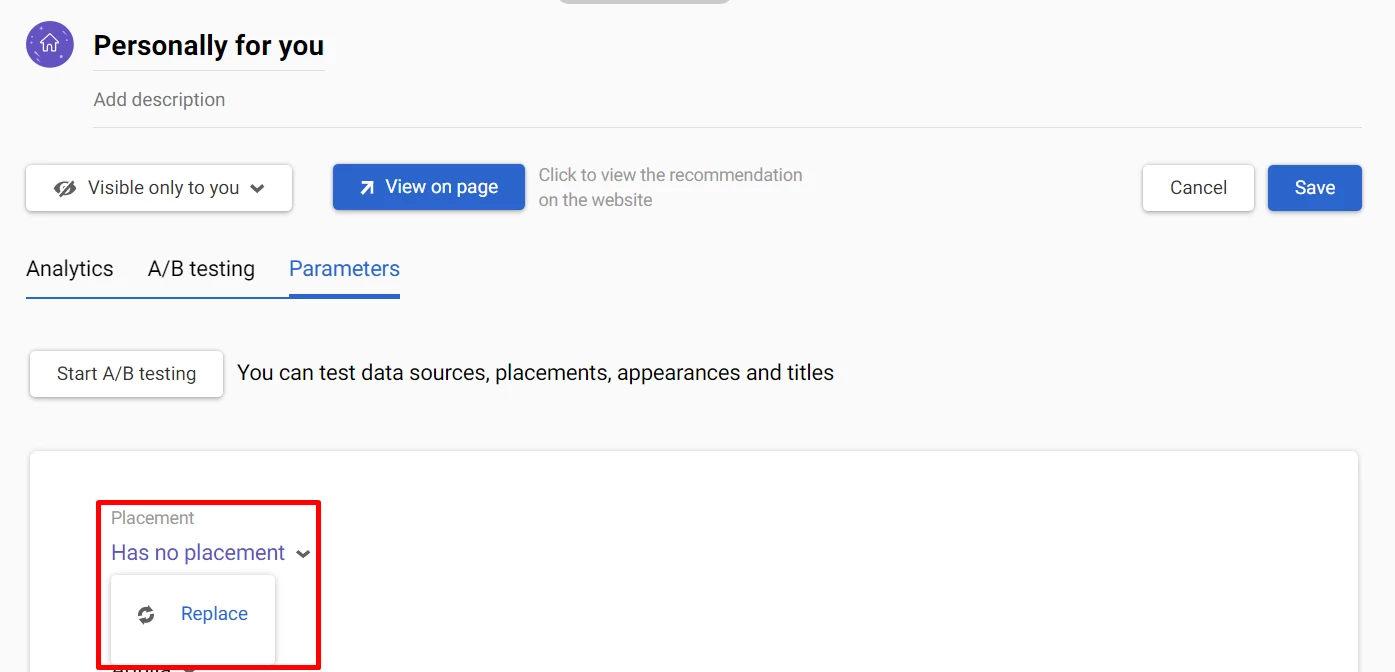
Click View on page to see how the block will be displayed on the website.
When you ensure the block layout is correct and the products are pulled up correctly, change the recommendation status from Visible only to you to Visible to website visitors.
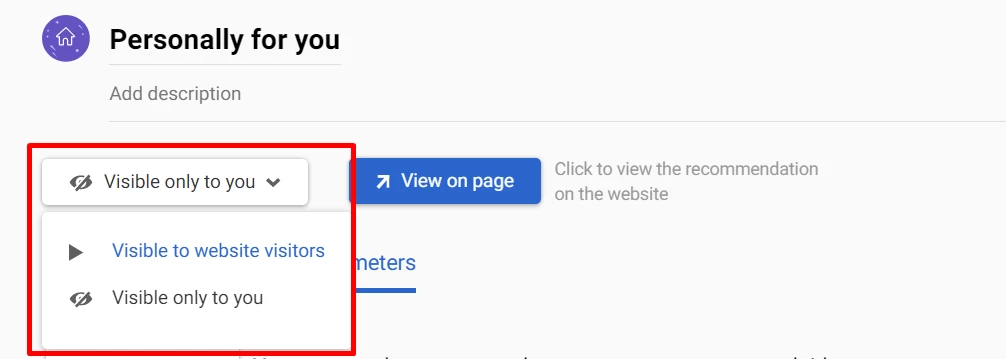
From that moment on, all website visitors see recommendations, and the system starts to collect statistics on its operation.
8. Block's Displaying in Account
You can use the following tools to sort out your recommendations:
- Search by recommendation name, placement name.
- Filtering by page type. By switching pages on the left, you see only recommendations on the selected page. The color of the placement font in the list corresponds to the color of the page marker on the left. For example, placements on the main page are in purple, on the category page – in pink, etc.
- Filtering by date.
- Filtering by statistics.
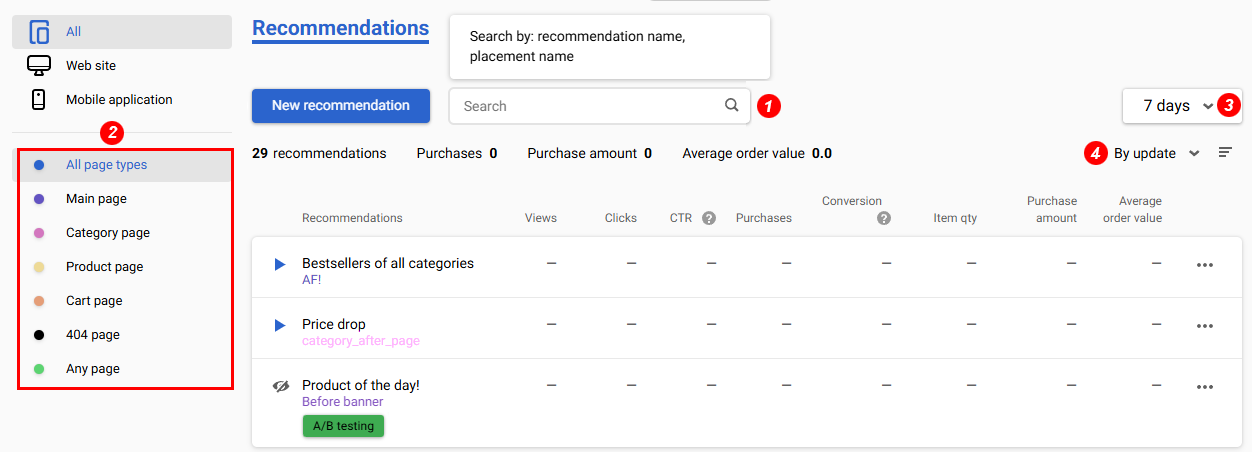
After publishing the recommendation on the site, the statistics on it will be given in the list:
- Views;
- Clicks;
- CTR (click-through rate);
- Purchases (transactions);
- Conversion rate;
- Item quantity;
- Purchase amount;
- Average order value.
Instructions for working with analytics
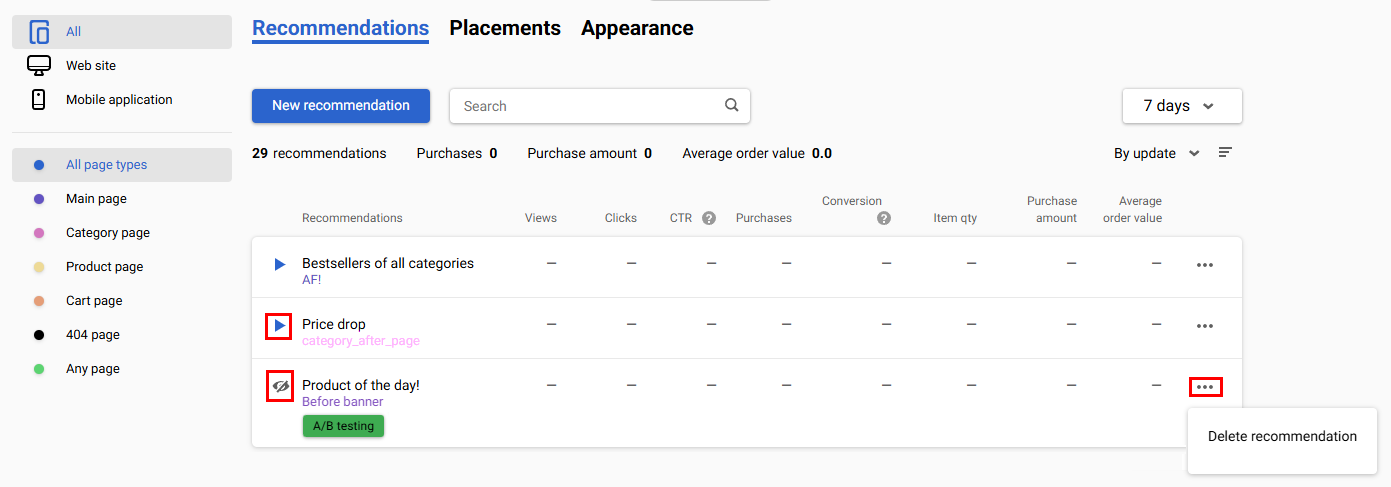
The start icon beside the recommendation indicates it is displayed on the site. The crossed eye icon indicates that the recommendation is visible only to you.
Click the ellipsis (three dots) on the right-hand side to delete a recommendation.
Updated 2 months ago