
Control Over Events, Tags and Promocodes
There is always a risk that some technical or human error will occur that will cause the processes you have automated to fail. To find out about such problems promptly, set up alerts about:
- Events received during a specific period to ensure the correct functioning of workflows and segmentation by events. If the integration breaks, events stop flowing into the system, associated workflows do not run, and associated conditional segments are not updated.
- Messages with specific tags sent over a specific period to maintain the expected frequency of mailings. Message tracking helps control mailing failures that are not related to the arrival of events: for example, due to a lack of funds.
Note
The most effective way to control triggers is to specify a lower limit on the daily number of events and message tags included in the workflow associated with that event. Therefore, we recommend that you assign tags to messages corresponding to the associated event.
- The number of promocodes in your Reteno account to ensure that you have enough unused promocodes left because if they run out, the system will not be able to send messages that use the corresponding type of promocodes.
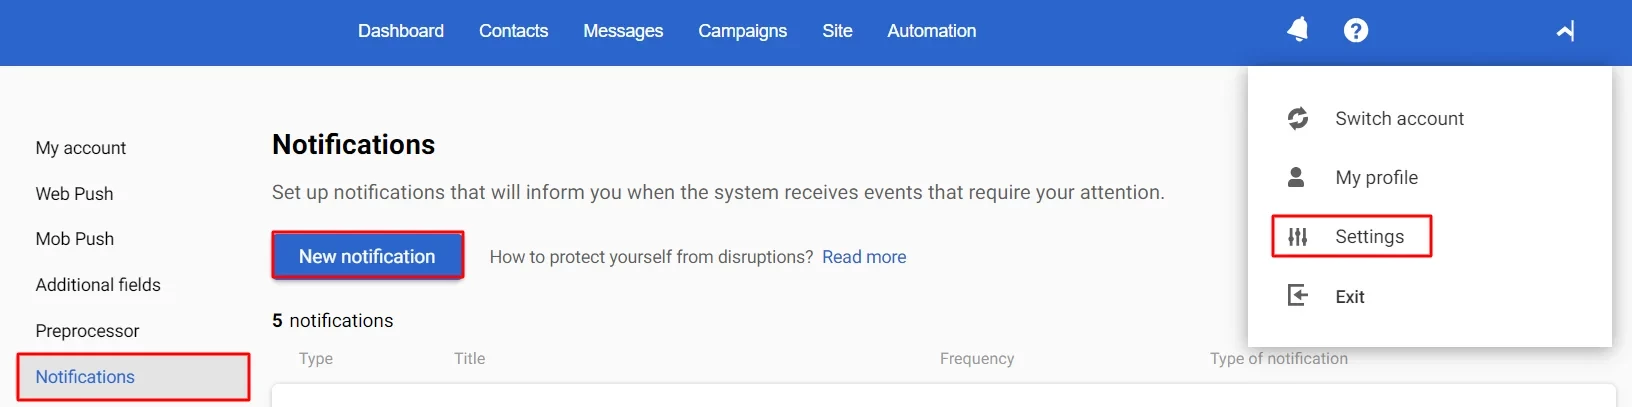
Creating Notification
- Go to your profile settings → Notifications and click New notification.
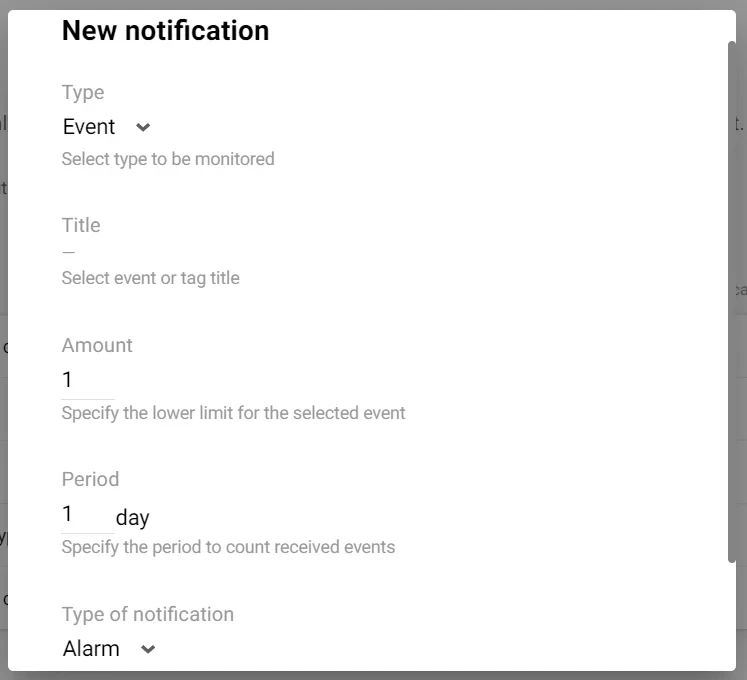
- Select the following parameters:
- Type (Event/Tag/Promocode),
- Title, or in the case of promotional codes – Type,
- Amount,
- Period (only for tags and events),
- Notification type (Alarm or Warning).
Note
We recommend using both types of notifications — Warnings and Alarms. For example, you can set a warning when there are 500 promocodes left in the system, and there is still time to respond, and an alarm for 50, when you immediately need to load the next list of promocodes.
- Click Create.
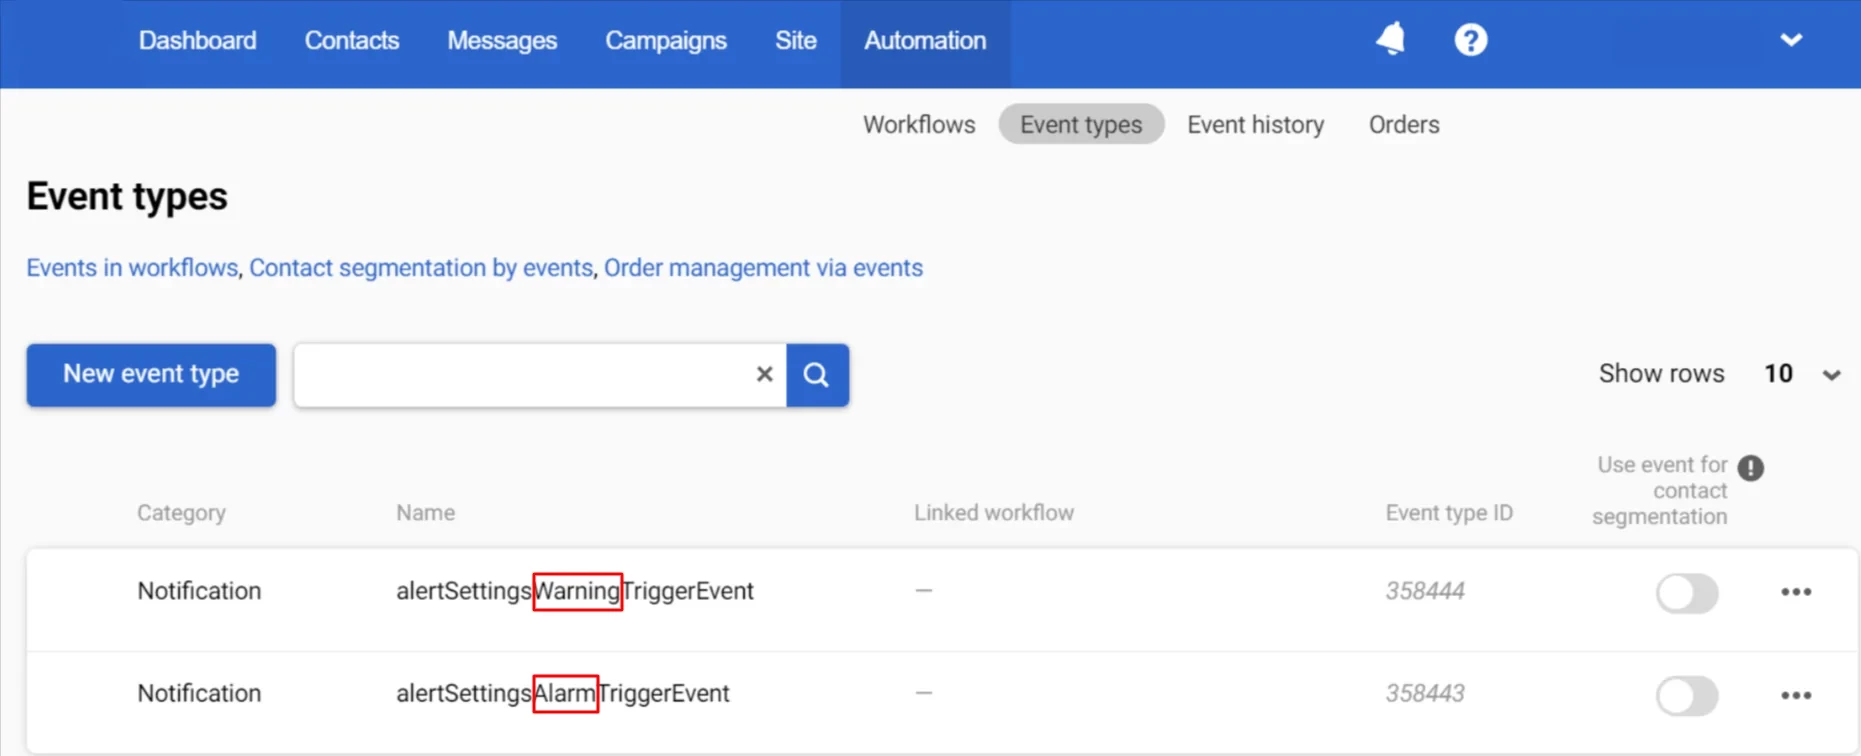
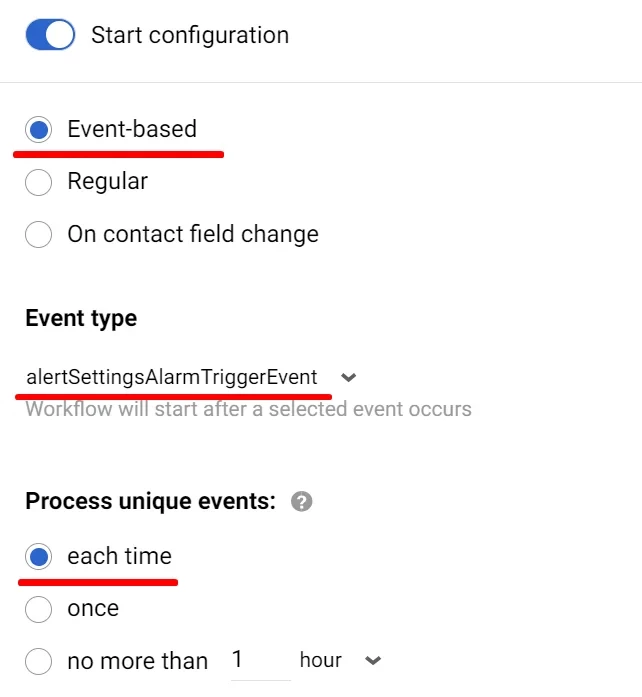
You can set up as many notifications as you wish. But all of them will be transferred through one of the following event types:
- Warning —
alertSettingsWarningTriggerEvent - Alarm —
alertSettingsAlarmTriggerEvent
The parameters of these events will contain the following data:
Name | Value |
|---|---|
alertLevel | WARNING/ALARM |
periodDays | The period selected for counting (only for tags and events) |
threshold | The lower limit for tags/events/promocodes |
alertTrackingSourceType | Notification type (TAG, EVENT, PROMOCODE) |
alertTrackingSourceName | Tag or event title/promocode type |
actualCount | The number of sent messages/events/promo codes in the account at the time the notification was sent |
organisationName | Your account name |
Create a message For each notification type – Warning and Alarm into which the parameter values from the event will be inserted, and a workflow through which this message will be sent.
Substituting Event Parameters into the Message
Create email and/or SMS messages into which data from the event will be inserted using Velocity variables.
Insert the variables into the message involved in the workflow in the $!data.get('name') format, where
$!data.get— extract data command,- the parameter name from which the value should be extracted is indicated in parentheses.
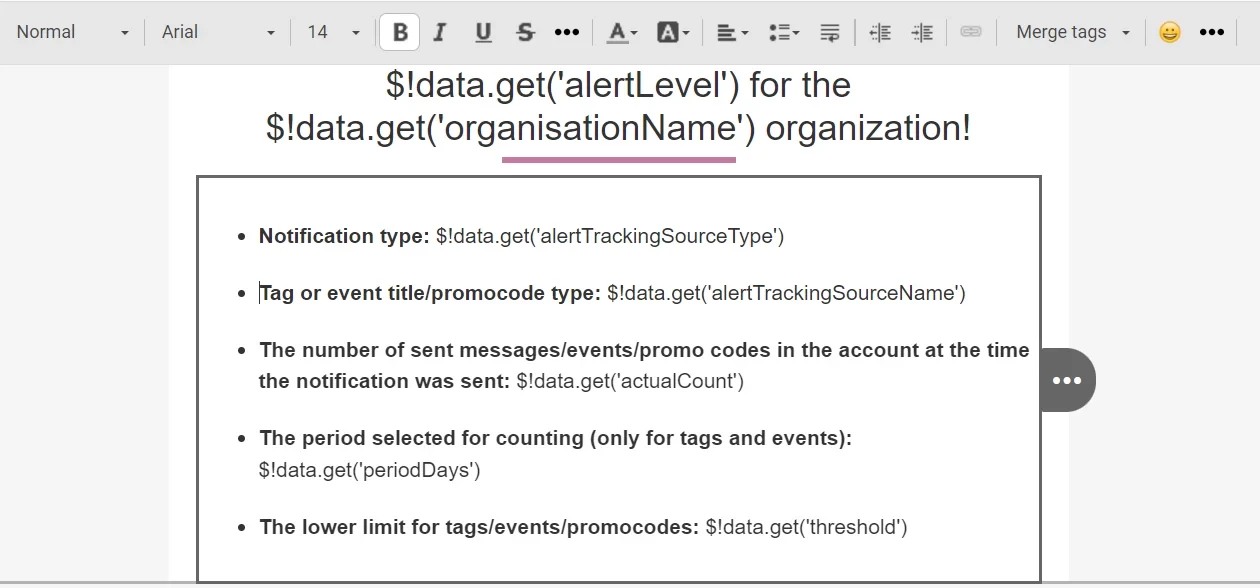
Since events can transmit data about both events and tags or promocodes, messages should be universal, for example:
$!data.get('alertLevel') for the $!data.get('organisationName') organization!
- Notification type:
$!data.get('alertTrackingSourceType') - Tag or event title/promocode type:
$!data.get('alertTrackingSourceName') - The number of sent messages/events/promo codes in the account at the time the notification was sent:
$!data.get('actualCount') - The period selected for counting (only for tags and events):
$!data.get('periodDays') - The lower limit for tags/events/promocodes:
$!data.get('threshold')
Setting Workflow
Create 2 workflows – for the Warning and Alarm events – with the Send obligatory (transactional) email or the Send transactional SMS tasks.
Below is an example for the Warning workflow; the Alarm workflow should be done in the same way.
Fill in block fields:
- Send obligatory (transactional) email:
- Contact’s email: manager's email address.
- Message: email with variables.
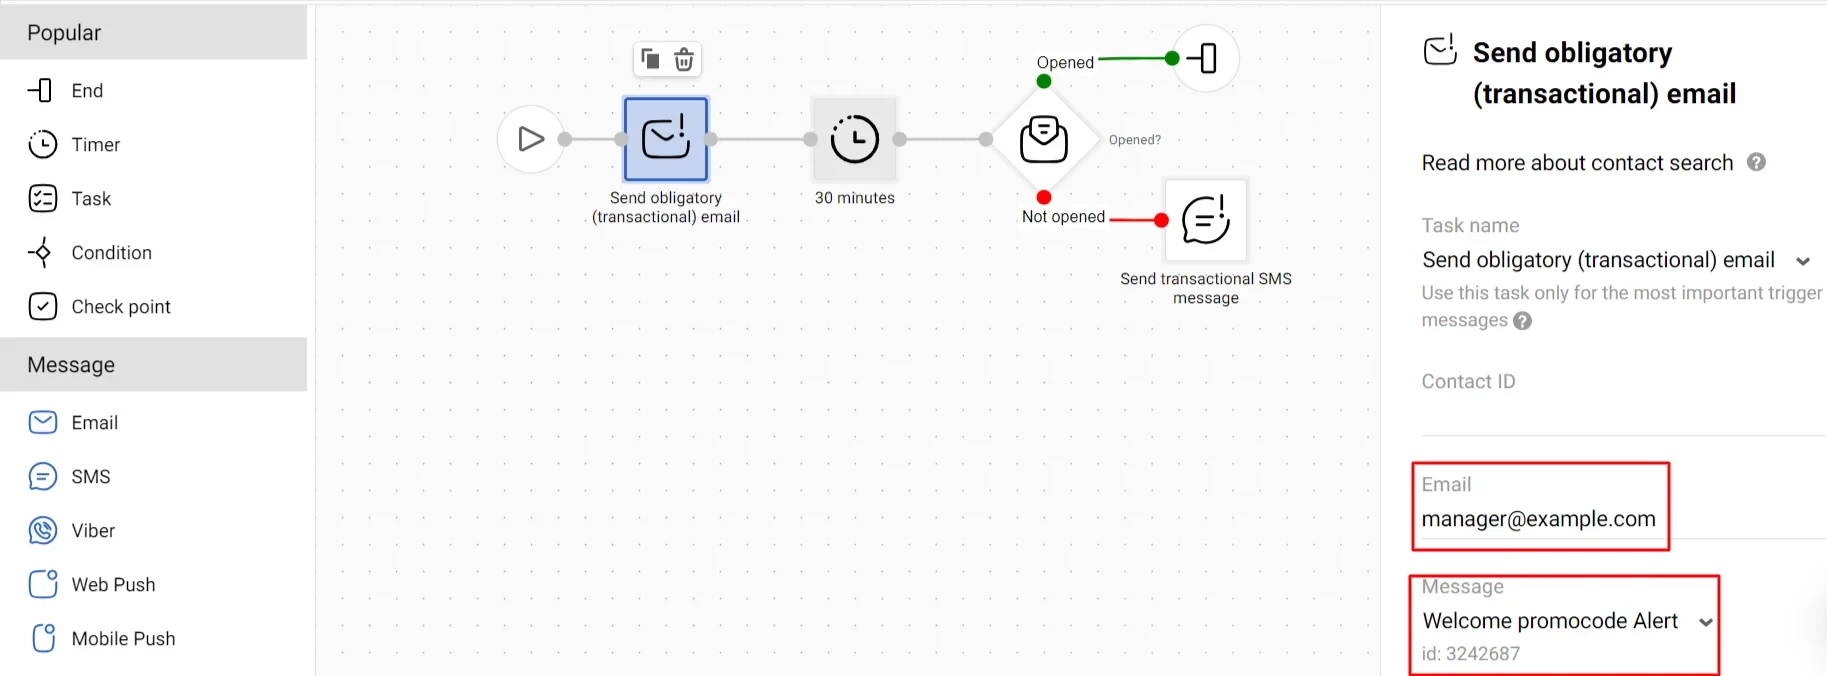
- Send transactional SMS:
- Message: SMS with variables.
- Phone: manager’s phone number in full international format.

Connect events to workflows according to the instructions and launch the workflows.
Now, whenever an event occurs related to one or another notification you created, the workflow will launch and send messages with information about the corresponding issues that need attention.
Updated 2 months ago